Migrating the ADFS 2.0 Configuration Database to MS SQL
By default when you configure ADFS 2.0 it will create a Windows Internal Database for its configuration database. However if you have a MS SQL server running already this is kind of unnecessary. Thankfully it's possible to migrate the ADFS 2.0 databases to MS SQL.

Preparations
It's smart to start with a backup of the Federation Server.
If your federation server is running in a farm and it's behind a load balancer, temporarily remove it from the load balancing configuration.
On the Primary federation service
- Download the SQL Server 2008 Management Studio Express software and install it (you'll need sqlcmd)
- Stop the ADFS 2.0 service. Start an elevated command prompt and type:
net stop adfssrv - Connect to the Windows Internal Database and detach the databases by running the following commands:
sqlcmd -S \\.\pipe\MSSQL$MICROSOFT##SSEE\sql\query<br/>use master<br/>go<br/>sp_detach_db 'adfsconfiguration'<br/>go<br/>sp_detach_db 'adfsartifactstore'<br/>go
- Connect to the MS SQL server and attach the databases by running the following commands (note that the paths are local paths on the SQL server so make sure that the files are on the local server):
sqlcmd -S <SQLServer\SQLInstance><br/>use master<br/>go<br/>sp_attach_db 'adfsconfiguration', 'c:\windows\sysmsi\ssee\mssql.2005\mssql\data\adfsconfiguration.mdf', 'c:\windows\sysmsi\ssee\mssql.2005\mssql\data\adfsconfiguration_log.ldf'<br/>go<br/>sp_attach_db 'adfsartifactstore', 'c:\windows\sysmsi\ssee\mssql.2005\mssql\data\adfsartifactstore.mdf', 'c:\windows\sysmsi\ssee\mssql.2005\mssql\data\adfsartifactstore_log.ldf'<br/>go<br/>alter database AdfsConfiguration set enable_broker with rollback immediate<br/>go
- Change the configuration database connection string to point to the new MS SQL server by running the following PowerShell commands:
$SecTokenServ = Get-WmiObject -NameSpace root/ADFS -Class SecurityTokenService<br/>$SecTokenServ.ConfigurationdatabaseConnectionstring="data source=<SQLServer\SQLInstance>; initial catalog=adfsconfiguration;integrated security=true"<br/>$SecTokenServ.Put()
- Start the ADFS 2.0 service. Start an elevated command prompt and type:
net start adfssrv - Change the configuration database connection string to point to the new MS SQL server by running the following PowerShell commands:
Add-PSSnapin Microsoft.ADFS.PowerShell<br/>Set-ADFSProperties -ArtifactDBConnection "data source=<SQLServer\SQLInstance>; initial catalog=adfsartifactstore;integrated security=true"
- Stop and start the ADFS 2.0 service:
net stop adfssrv
net start adfssrv
Don't forget to add the primary federation server to the load balancing configuration.
To migrate other ADFS 2.0 servers in the farm start by removing the server from the load balancing configuration and stopping the service (net stop adfssrv) on that server. Then start at step 5 of steps above.
Afterwards add the servers back into the load balancing configuration to have it accept requests.
Token Signing Certificate: The Root Certificate is invalid
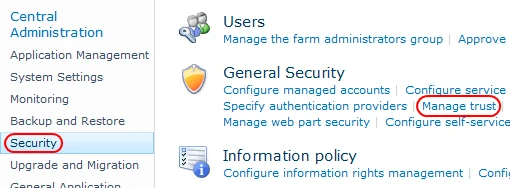
When you try to add a trust relationship in SharePoint 2010 using the Central Administration you might get an error.
The root certificate that was just selected is invalid. This may be because the selected certificate requires a password and we do not support certificates that require a password. Please select another certificate.
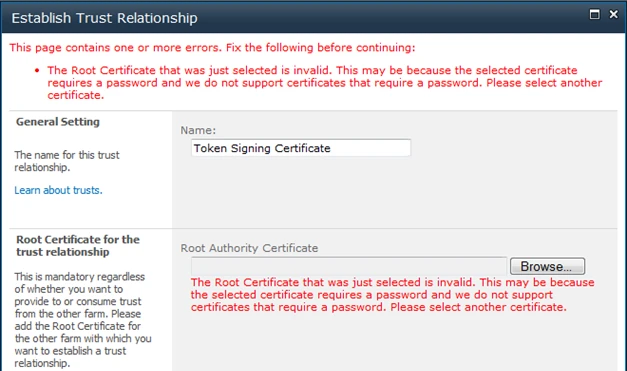
I was certain that the certificate was correct and should be accepted. I managed to import the certificate through PowerShell.
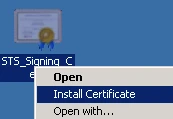
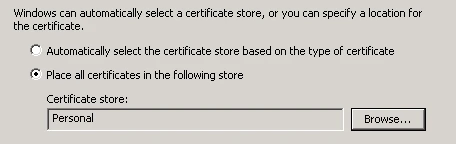
- Import the certificate into the Windows Certificate Store. Specifically the Personal store
- Start a SharePoint 2010 Management Shell session
- Locate the certificate in the Personal folder of the Windows Certificate Store and copy the Thumbprint
dir cert:\CurrentUser\My
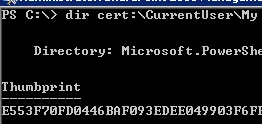
- Run the following commands:
 $Cert = Get-Item("cert:\CurrentUser\My\" + "<thumbprint>".Replace(" ", "").ToUpper())
New-SPTrustedRootAuthority -Name "Token Signing Certificate" -Certificate $Cert
The certificate should now be imported and the trust should be visible in the Central Administration.
Enable Claims based authentication on an existing web application
When you provision a web application in SharePoint 2010 you get the option to enable Claims based authentication. However, after the provisioning there's no option in the GUI to turn it on. PowerShell saves the day again with the option to change from classic to claims based authentication using the lines below.
$WebApp = Get-SPWebApplication "http://site:80"
$WebApp.UserClaimsAuthentication = "True"
$WebApp.Update()
The user running these command should be a member of the SharePoint_Shell_Access role on the config DB, and a member of the WSS_ADMIN_WPG local group.
There are some cases where the web.config wasn't updated automatically with the appropriate entries to enable claims based authentication. This will then have to be done manually. To do so read step 5 from this blog post.
ADFS Error: The AD FS auditing subsystem could not register itself with the system. The auditing privilege is not held.
This error might occur when the ADFS service account doesn't have the audit permissions to log audit events.
To fix this error you have to grant the ADFS service account the permission in the local security policy of the server running ADFS, or when the server is a Domain Controller in the Default Domain Controller Policy.
Local Security Policy
- Start the Local Security Policy console
- Locate the User Rights Assignment container and select it (Security Settings\Local Policies\User Rights Assignment)
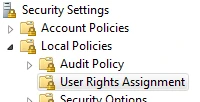
- Double-click the Generate security audits node
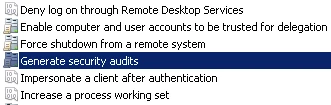
- Add the service account of ADFS to the list
Default Domain Controller Policy
- Start the Group Policy Management Console
- Edit the Default Domain Controllers Policy (<Forest>\Domains\<Domain>\Group Policy Objects\Default Domain Controllers Policy)
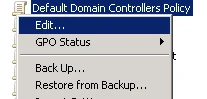
- Locate the User Rights Assignment container and select it (Computer Configuration\Policies\Windows Settings\Security Settings\Local Policies\User Rights Assignment)
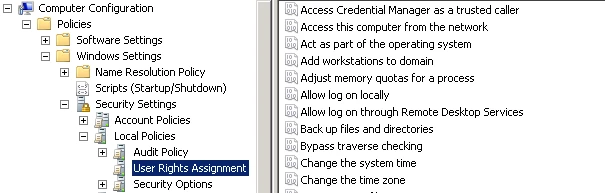
- Double-click the Generate security audits node
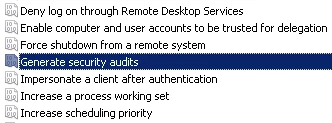
- Add the service account of ADFS to the list
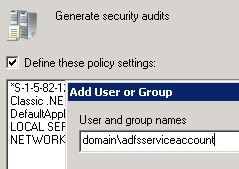
You might have to run gpupdate and restart the service to have the changes take effect.
DNS doesn’t resolve on Windows 2008
Someone asked me why the domain viewtrip.com wasn't working on our network. IE was returning that it couldn't find the server. This soon pointed in the direction of DNS. The nslookup of the domain also failed. The Global Logs in the DNS Manager returned some 5504 events.
The DNS server encountered an invalid domain name in a packet from .62. The packet will be rejected. The event data contains the DNS packet.
After hitting Google with this event it soon gave me a couple of options to solve it. A big thank you goes to Shilpesh Desai! Source
- Check following registry key and value set for it:
HKEY_LOCAL_MACHINE\System\CurrentControlSet\Services\DNS\Parameters\DisableAutoReverseZones
According to KB 198410 it should have a non-zero value
- Packet was forwarded to non-recursive DNS server. I will recommend to switch to forwarders for few days to check if that helps.
- Server is quering for DNAME record, which is not supported. Reponses containing DNAME (rrtype - 0x0027) record.
- Extended DNS (EDNS) packets are received but the server that is attempting to resolve the EDNS traffic doesn't support EDNS or have it enabled. An easy workaround is to disable EDNS.
dnscmd /Config /EnableEDnsProbes 0
One disadvantage of this solution is that DNSSEC is not possible anymore as this relies on the EDNS principle.
More info on EDNS
More info on DNSSEC
Unusual computer account icon
Today I discovered a weird/unfamiliar looking computer account icon my AD.

Normally I would say that this is a disabled computer account, however experience told me that it should have a read circle with a white cross in it.

After checking the attribute editor I came to the conclusion that the account is indeed disabled.

The computer has been in storage for quite some time, so I figured that the computer hasn't authenticated for too long causing the machine password to expire and thus disabling the account. If you have any other reason why it might disable itself please comment below!
Can’t edit all code on a SharePoint 2010 page with SharePoint Designer 2010
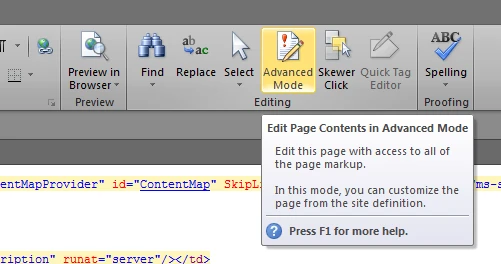
One of the most basic things you would want to do with SharePoint Designer 2010 is editing the layout of the page. This seems easy enough, but when SharePoint Designer 2010 blocks access to the yellowish parts of the code it becomes quite impossible.
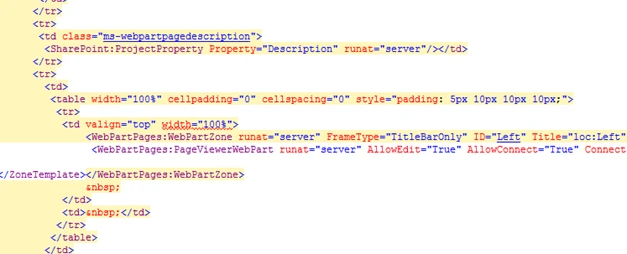
To gain access to all of the page's code you'll have to enable the advanced mode. The button can be found in the ribbon when editing a page.
Event 1004, 1001, 1015 – Microsoft.ResourceManagement.Service.exe
While setting up the User Profile Synchronization services on SharePoint 2010 I had a couple of warnings and errors that I had to address. This one seemed worth mentioning.

Detection of product '{90140000-104C-0000-1000-0000000FF1CE}', feature 'PeopleILM', component '{1C12B6E6-898C-4D58-9774-AAAFBDFE273C}' failed. The resource 'C:\Program Files\Microsoft Office Servers\14.0\Service\Microsoft.ResourceManagement.Service.exe' does not exist.
Followed by event 1001:
Detection of product '{90140000-104C-0000-1000-0000000FF1CE}', feature 'PeopleILM' failed during request for component '{9AE4D8E0-D3F6-47A8-8FAE-38496FE32FF5}'
And event 1015:
Failed to connect to server. Error: 0x80070005
These were repeated for another component GUID.
The reason is that the WMI calls are made under the credentials of Network Service account and that this account doesn't have permissions on the folder indicated in the event.
After I gave the Network Service account read and execute permissions on the folder the events didn't reappear.
Update:
After a couple of hours I noticed new events in the event viewer related to the previously mentioned.

Event 1004:
Detection of product '{90140000-104C-0000-1000-0000000FF1CE}', feature 'PeopleILM', component '{CF90B971-D78A-4794-8F90-EB5FB5028DDA}' failed. The resource 'C:\Program Files\Microsoft Office Servers\14.0\SQL\DatabaseSettings.sql' does not exist.
Event 1001:
Detection of product '{90140000-104C-0000-1000-0000000FF1CE}', feature 'PeopleILM' failed during request for component '{9AE4D8E0-D3F6-47A8-8FAE-38496FE32FF5}'
Event 8193 – Volume Shadow Copy Service error
SharePoint Search has its issues sometimes. This one seems to happen to a lot of people, but the solutions that I've found weren't too clear about what to do to solve this. Here's the event that is triggered.
 Volume Shadow Copy Service error: Unexpected error calling routine RegOpenKeyExW(-2147483646,SYSTEM\CurrentControlSet\Services\VSS\Diag,...).  hr = 0x80070005, Access is denied.
</p><p>Operation:
</p><p>   Initializing Writer
</p><p>Context:
</p><p>   Writer Class Id: {0ff1ce14-0201-0000-0000-000000000000}
</p><p>   Writer Name: OSearch14 VSS Writer
</p><p>   Writer Instance ID: {07c936a8-347c-4e39-8014-2a057f611382}
</p><p>
If you go to the Details tab, you'll see some additional information about the event.
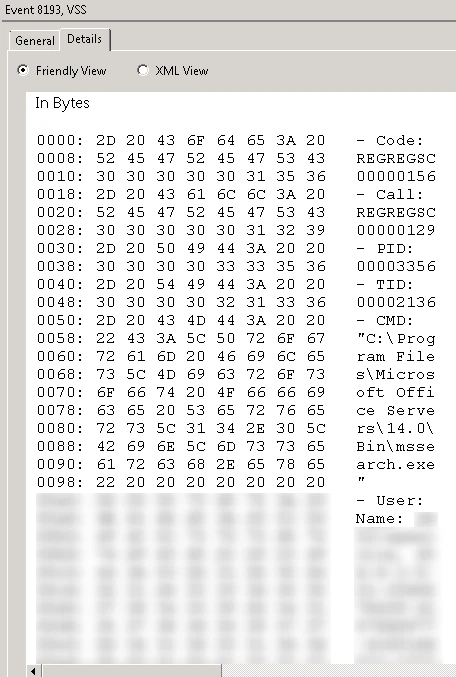
The part after User and Name is the most important here, which I've blurred for security reasons. This is the account name that needs full control on the registry key HKLM\SYSTEM\CurrentControlSet\Services\VSS\Diag.
- Start regedit.exe
- Navigate to the key HKLM\SYSTEM\CurrentControlSet\Services\VSS\Diag
- Right-click the key Diag and select Permissions
- Add the account that was indicated in the event and provide it with Full control permission
Unable to edit the DCOM settings
Recently I had a couple of DCOM errors in my event log for APPID {61738644-F196-11D0-9953-00C04FD919C1} (IIS WAMREG admin Service. It was again a classic case of Local Activation permissions that were missing. Normally one would fix that by going to DCOMcnfg.exe and editing the settings as indicated in this article. However this time it was a bit different as the settings were disabled.
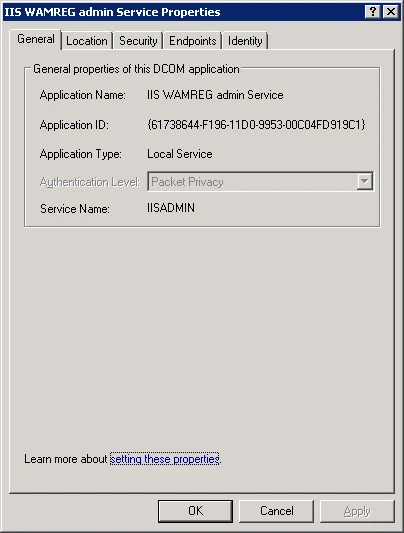
Obviously this is a permission problem. The solution is to do the following:
- Run Regedit.exe and browse to "HKEY_CLASSES_ROOT\AppID\{61738644-F196-11D0-9953-00C04FD919C1}" key
- Right-click the key and select Permissions
- Click the Advanced button in the permissions window and select the Owner tab. Under Change owner select the local Administrators group and click on OK.
- Then on the permissions window, select the local Administrators group and assign it Full Control. Don't change the permissions for the TrustedInstaller account.
- Click on Apply (keep this window open as you'll have to restore the permissions when you're done)
- Rerun the DCOMCNFG.exe. You should now be able to change the DCOM settings for the IIS WAMREG admin service.
- Go back to the permissions window of the registry key and remove the check in Full Control of the local Administrators group (this results in only Read permissions)
- Go to the Owner tab and make "NT Service\TrustedInstaller" of the local computer owner of the key again.
Quite a hassle, but it works!